


Ultimate Arcade II Cab Kit
The Original Version
Review by James Robbins
April, 2005
I ordered the original version of the Ultimate Arcade II kit just as they were closing them out so I got a pretty good deal on it. I am guessing the newest version is pretty much the same. It was easy to pay for with my paypal account, and they had a web page that showed where I was in the production queue. I ordered the unit on March 15th, and received it on March 31st. I was pretty happy that it only took two weeks to make and ship. It came in three boxes on a pallet.
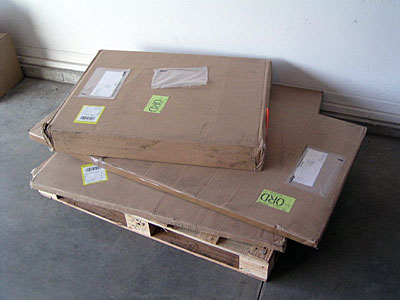
Two of the boxes weren’t too heavy, but the third had most of the components. That top box you see arrived a little beat up, but the packing inside was fairly decent, and I had no damage to any of the parts. The lighter boxes contained the bottom sides and the top sides. Everything else was in the heavy box.

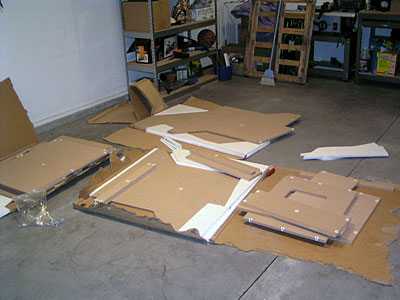
The instructions and assembly parts were buried in the heavy box. After I removed a few layers I found them. The instructions seemed very simple, and had a nice legend that showed the whole assembly schematic by part letter, and a list of parts that were included.

In the “What you will need” section, it showed some icons designating two people, 1 hour, a screwdriver, and a hammer. It also warned not to use power tools. I am not totally inexperienced in assembling kits, or even building stuff from scratch, but the little icons were not very accurate. It took my buddy and me 3 hours and in addition to the recommended tools, we had to use a mallet, a stubby screwdriver, and a power drill/driver to get it put together.
The assembly system is pretty standard and uses cam locks and bolts. I looked through the instructions and it had me add the cam locks and bolts for each part as I needed them. The parts were labeled alphabetically and the stickers were easy to peal off when done. I went ahead and added the cam locks to all the parts I could so the actual assembly would be quicker. I found that not all of the holes for the cam locks were the same size or the same depth from edge of the board. Some popped in easily, and some were difficult to get in even with a hammer or mallet. They seemed close enough but I had minor alignment issues during the project.
My friend and I went ahead and started putting pieces together. We found that the force of a normal screw driver wasn’t sufficient to lock the cam bolts in place. We used his DeWalt cordless drill (and now I want one) to get the locks secured tightly. In the process we did break two of the cam locks as we tried to tighten them.
In one case, I didn’t have the bolt in the hole all the way when my buddy started up the drill, so the metal in the cam lock broke. In the other case, it wasn’t possible to even get the cam bolt to line up, so we broke that lock trying to get it in. Anyway, the cam locks seemed kind of cheap. We did keep the torque on the drill turned way down so we weren’t using excessive force.
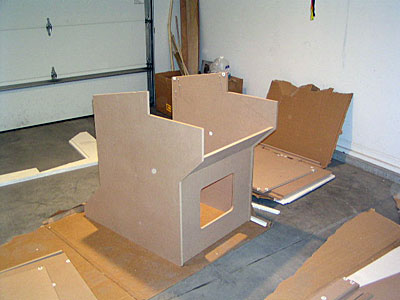
Unfortunately, the cab kit didn’t come with any extra parts at all. It would have been nice to include an extra couple of cam locks and bolts, just in case. Other than the physical force required to turn the cam locks, the assembly was pretty straight forward. I did run into a little difficulty putting the rear kick plate on. I had to use a stubby screw driver and crawl into the base to even reach a couple of the cams. They didn’t tighten up nice, but there were 4 cams holding it on, so it was ok.
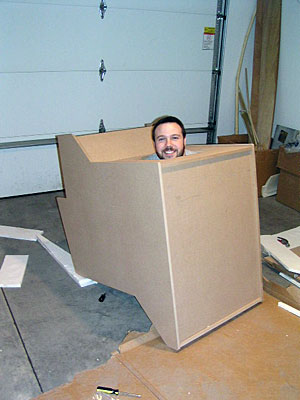
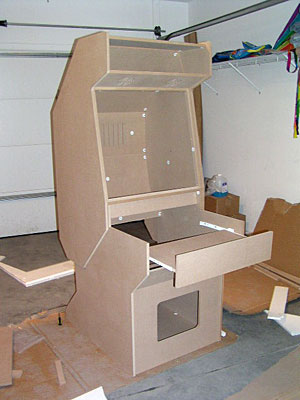
Jim in the Box!
The top section was the same story as the bottom; lots of force needed to turn the cam locks, but easy to put together. Once top and bottom halves were assembled, it was time to put them together. We set the top part on and lined it up with the bottom, but found they didn’t snap in nicely. I had to use a mallet on the top of the upper half to get the bolts to pop down into the locks. There were screws in addition to this to hold the top on.
With 8 screw/lock points tightened up, the top was solid, and it wasn’t ever coming back off. Now it was time for the keyboard drawer. The unit came with some roller rail things, and they screwed easily into the sides of the drawer. There were predrilled holes on the inside of the cab so it was lined up for me. As a minor note, the rails are white, and I think I would have preferred black. *shrug*
I didn’t order one of the pre-made control panels as I wanted to design my own ergonomic version with the buttons at an angle. I am guessing it would be pretty easy to build as well, and there are some predrilled holes and angle brackets for screwing any control panel on.
Lastly, I needed to screw on the rear access panel where the computer would sit. We ran into one more snag here. The rear panel didn’t fit into its spot and I needed to shave off an extra 3/16th of an inch. Ok, I’ll admit it, I haven’t done that part yet and the back panel is still off…but I will.
Now what’s left to this project? The obvious things are adding a screen, a control panel, and a computer or game console. Otherwise, for the cab itself I plan to round the edges and do some sanding. I don’t like T-molding and this version didn’t have a slot anyway. I also want to add some wheels and I think I’ll add some extra 2x4s on the bottom for support for them. I’ll probably put in some car speakers and drill out bigger holes for them then the little grills that are under the marquee area.
I’ll also add some hinges for the back access panel instead of screwing it in, and probably a little shelf so my Xbox and Dreamcast can fit in the coin door hole. My kids are only 5 and 8, so they don’t have any money to feed the machine even if there was a real coin mech. *grin* Here are a few more pics of the assembled unit…
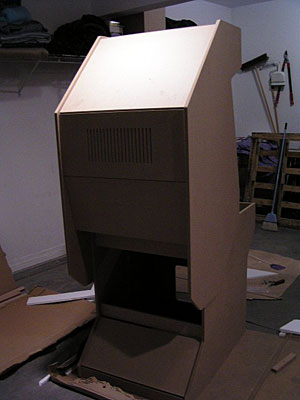
Full Back View
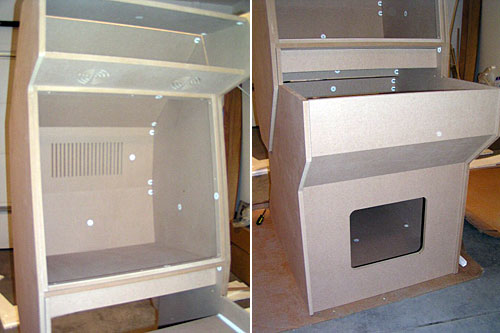
Front View, Top and Bottom
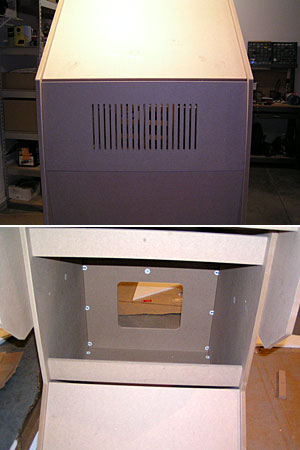
Back View, Top and Bottom (Yes, I don’t have the access panel cut to fit
yet…)
A Quick Summary
- Great price when you can get it on sale!
- Quick and easy assembly, even though the cams are hard to turn.
- Nice shape and look, and it’s also very stable.
- The wood panel alignment was very tight in some places and had minor gaps in others.
- Overall, a good project kit!
Should you buy one? We’ll, since you can’t buy exactly the same thing as this… There will be less work to do painting and finishing the new version, so that is good. The price is a little higher now, but they do have coupons and specials every couple of months. Yeah, if you want a project that involves doing most of the work yourself without actually doing the hard stuff (like cutting out the cab frame and trying to route in the t-molding holes). It probably costs about twice as much as the raw materials, but in my case, the 3 hours of work and extra expense are way worth the entire 2 weekends I would have worked on it otherwise.
I’ll post some pics of the finished machine on my web site in a month or two or whenever I get to finishing the cab. Happy cab building!
James Robbins, james![]() jdrobbins.com
jdrobbins.com
